


Are Alumawood DIY Kits Right for Your Patio?
Alumawood DIY kits are packaged aluminum patio-cover systems for homeowners who want a durable shade structure but are prepared to handle planning, assembly, and local building requirements. A complete kit typically includes the structural Alumawood materials, preselected components, and installation hardware such as brackets, bolts, nuts, and screws.
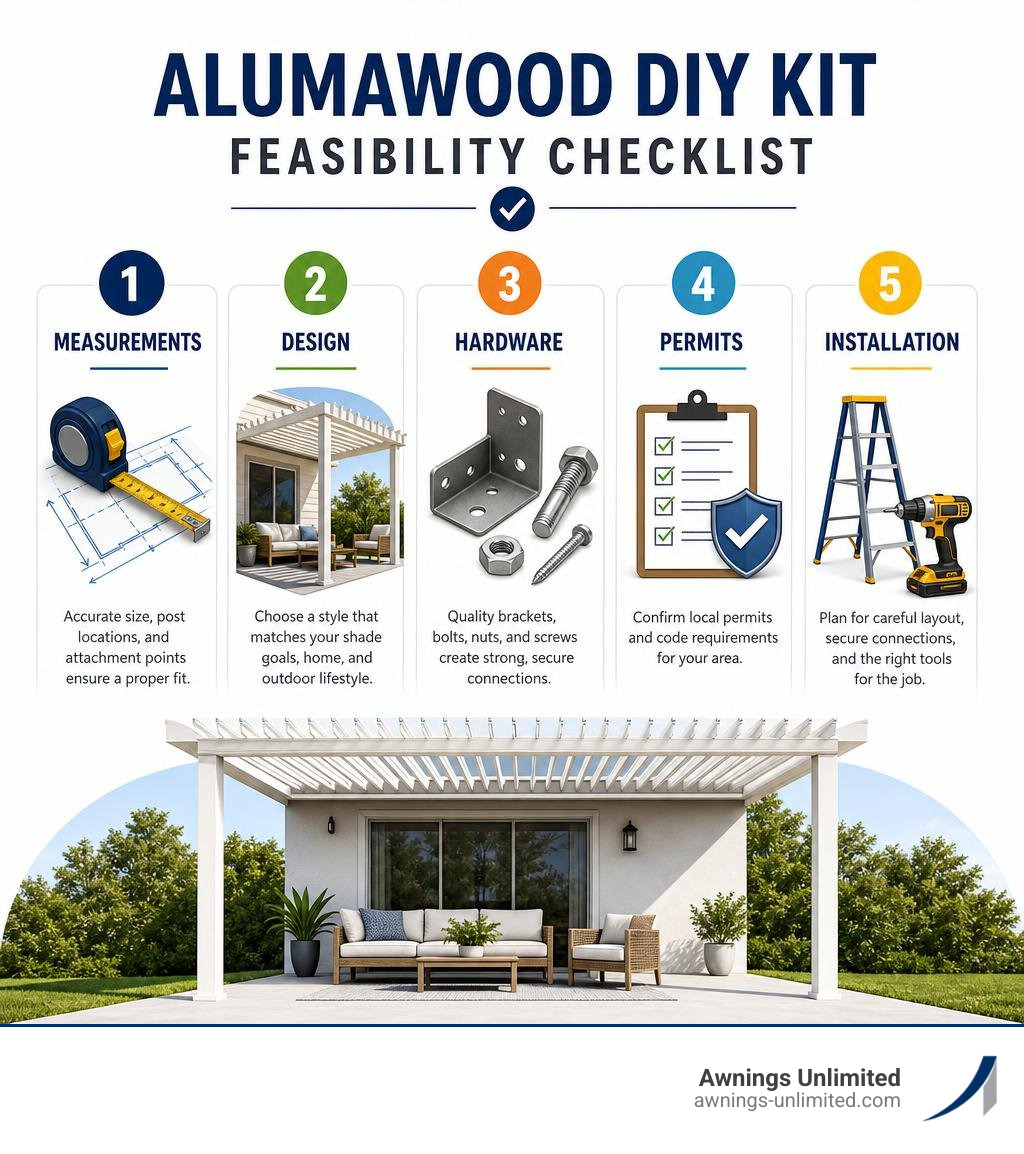
Before committing, confirm these essentials:
- Your measurements are accurate. The cover size, post locations, house attachment point, and patio surface all affect the design.
- The kit style fits your goal. Options can include open lattice for filtered shade or solid panel systems for more weather protection.
- You can manage the installation work. Assembly requires careful layout, secure structural connections, and the correct fasteners.
- Your site meets local requirements. Permits, wind and snow loads, and attachment details may affect what is feasible in your area.
For homeowners who want lasting outdoor comfort, the big question is not simply whether a kit can be assembled. It is whether the planned cover is measured, designed, and attached correctly enough to perform through years of sun, wind, and changing weather.
At Awnings Unlimited, we have served Northern Utah with custom Alumawood patio covers, awnings, carports, and pergolas since 1976. Our experience with Alumawood DIY kits and professionally installed shade structures helps homeowners assess whether a DIY project fits their space, goals, and local conditions.
Key Components and Design Styles of Alumawood DIY Kits
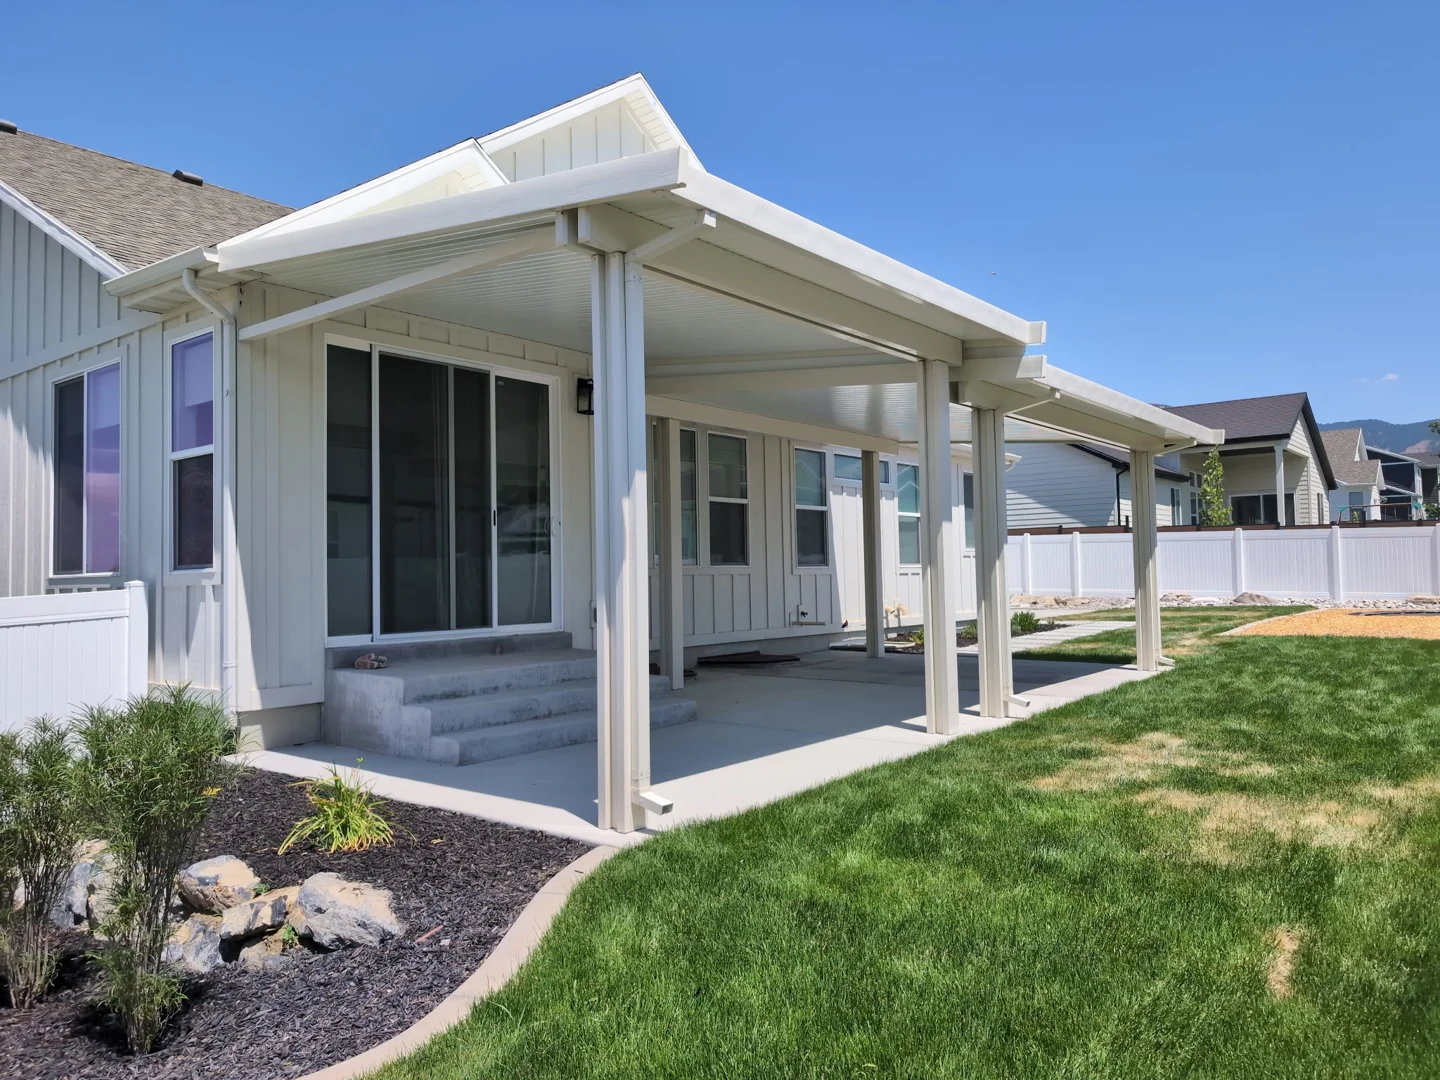
When exploring alumawood diy kits, the first major decision involves selecting a style that matches your shade goals, house architecture, and outdoor lifestyle. Alumawood engineered aluminum products provide the embossed, classic texture of painted wood without the endless cycle of sanding, scraping, and repainting. To dive deeper into overall system capabilities, check out our Alumawood Patio Covers Ultimate Guide.
Open Lattice, Newport Flat Panel, and Equinox Options
Alumawood shade structures are available in several primary designs, each offering a distinct level of sun control and aesthetic appeal:
- Open Lattice (Pergola Style): Open lattice kits utilize repeating aluminum shade tubes spaced at set intervals across top rafters. This design filters harsh sunlight while maintaining an airy, open breeze. You can adjust tube spacing during design to block anywhere from 40% to 60% or more of direct light.
- Newport Flat Panel (Solid Roof): The Newport system utilizes heavy-duty aluminum tongue-and-groove solid ceiling panels. This design delivers total shade and complete rainfall protection, turning your concrete slab, deck, or paver patio into a year-round outdoor room.
- Maxx Panel (Insulated Solid Roof): For severe thermal protection, Maxx panel systems feature an insulated foam core sandwiched between Alumawood aluminum skins. Insulated panels dampen rain noise and dramatically reduce radiant heat transfer during hot summer afternoons.
- Equinox Louvered Systems: Louvered covers feature motorized, adjustable aluminum louvers that tilt open for full sun, angle for perfect shade, or close tight against rain.
Color Selection and Aesthetic Customization
Alumawood DIY patio cover kits are available in factory-baked enamel paint finishes designed to handle brutal UV exposure and thermal cycles across Utah and Wyoming. Factory finish color options include:
- White: A clean, crisp choice that highlights classic architectural trim.
- Desert Sand: A popular neutral tone that blends seamlessly with earth-toned stucco and brick.
- Spanish Brown: A rich, dark accent color perfect for contrasting lighter exterior walls.
- Latte: A soft, warm beige with timeless appeal.
- Mojave Tan: A deeper tan shade built for desert and mountain backdrops.
- Graphite: A bold, contemporary dark gray ideal for modern architectural homes.
- Adobe: A rugged, warm clay finish that coordinates well with southwestern and Mediterranean masonry.
Because the deep wood-grain texture is embossed directly into structural aluminum elements, your color choice stays vibrant for decades without peeling, cracking, or chalking.
What Comes Included in a Complete Package?
One common question homeowners ask before taking on a project is what actually arrives on the delivery truck. A genuine Alumawood DIY kit is packaged as a complete, self-contained installation bundle so you do not have to wander through home improvement aisles searching for missing components. For a complete breakdown of structural kits, see our DIY Patio Cover Kits Complete Guide.

Standard Hardware, Brackets, and Fasteners
A complete DIY kit contains all structural components and dedicated connecting hardware required for full assembly:
- Structural Beams and Headers: Heavy-gauge 3″x8″ aluminum structural headers that span between support posts.
- Rafters and Ceiling Panels: Solid flat pans, insulated roof panels, or lattice tubes pre-cut to your ordered dimensions.
- Support Posts and Inserts: Structural post columns along with heavy steel post inserts where ground anchoring demands added structural rigidity.
- Attachment Brackets: Specialized house ledger brackets, header brackets, side plates, and post-to-beam connection hardware.
- Color-Matched TEK Fasteners: A complete assortment of self-drilling #14 TEK screws (3/4″) for main structural connections and #8 TEK screws (1/2″) for accent trim, along with all necessary heavy bolts, washers, and expansion anchors.
Accessories and Fan Integration for Alumawood DIY Kits
If you plan to add lighting or ceiling fans to your patio cover, standard structural aluminum panels cannot simply be drilled into with wood screws. Ceiling fans require dedicated internal reinforcement.
Alumawood provides custom-engineered accessory kits, such as the standard 2’6″ Fan Kit, designed specifically for fan integration:
- Structural Fan Beam: Includes a 3″x8″ Alumawood beam pre-sized to 2’6″ that mounts internally between main roof rafters or header beams. This structural aluminum member securely supports the dynamic weight and movement of outdoor ceiling fans.
- Inside Mill Finish Brackets: A pair of mill-finish inside brackets engineered for clean concealment during new construction assembly.
- Outside Painted Brackets: A pair of color-matched outside painted brackets used when retrofitting a fan kit onto an existing Alumawood cover.
- Included Fasteners: Comes supplied with 10 #14 TEK screws (3/4″) and 20 #8 TEK screws (1/2″) for proper load distribution.
By routing electrical wiring inside the hollow Alumawood beam during assembly, you get a clean, hidden installation that keeps electrical lines safe from moisture.
Designing, Ordering, and Preparing for Installation

Unlike standard off-the-shelf lawn furniture, alumawood diy kits are manufactured to exact, order-specific dimensions. Success depends on thorough upfront planning before any material is cut or shipped.
Design Verification and Measurement Process
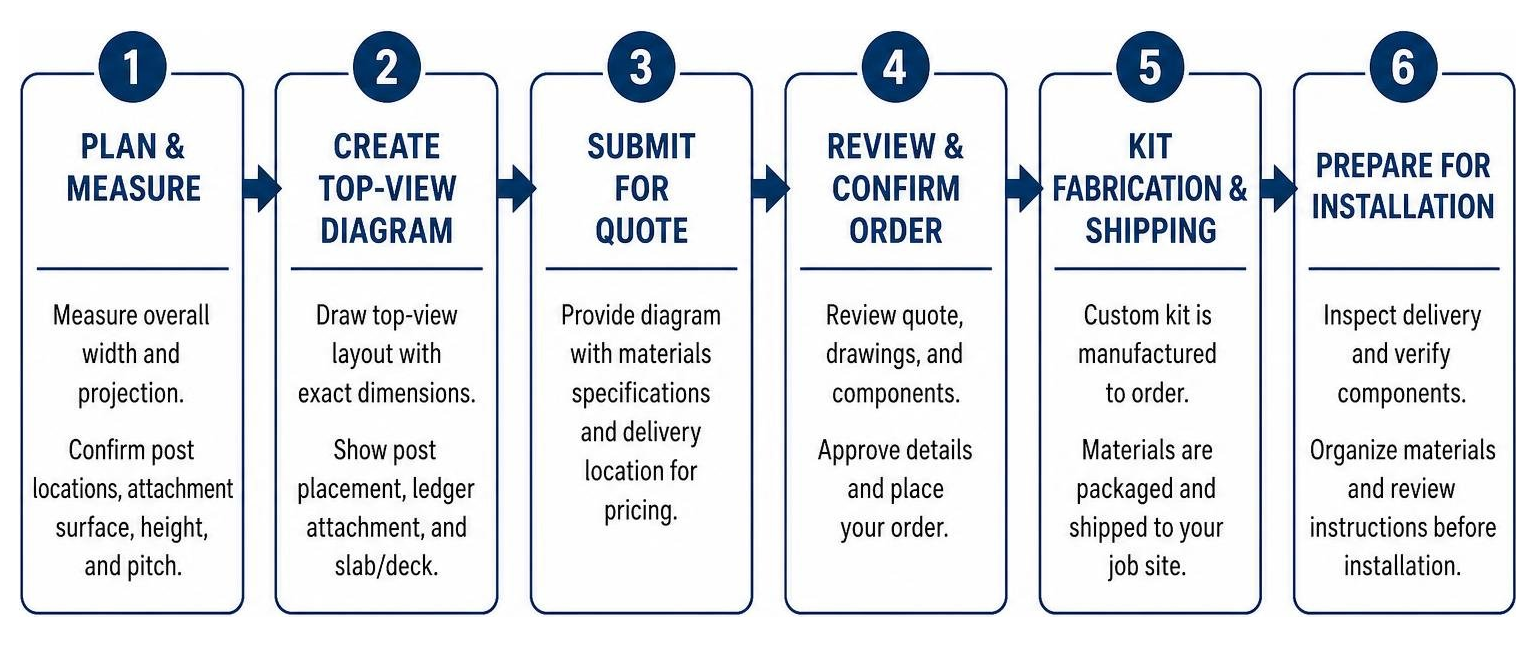
Before placing an order, gather accurate dimensions and produce a top-view structural sketch. To get step-by-step guidance on structural layout, explore our DIY Instruction Guides.
When sketching your patio footprint, verify the following details:
- Overall Dimensions: Measure total width along the house ledger and exact projection outward from the attachment wall.
- Post Spacing and Placement: Identify post locations relative to concrete slab edges, footing pads, or deck joists.
- House Attachment Surface: Identify whether your ledger bracket connects to wood wall studs, exterior brick, concrete masonry unit (CMU), or roof rafter tails (fascia mount).
- Height and Pitch: Calculate proper clearance under the front header beam while accounting for structural roof slope to facilitate proper rain drainage.
Ordering and Customizing Alumawood DIY Kits
When ordering a custom DIY kit, review the supplier’s ordering policies:
- Top-View Diagram Submission: Suppliers require an accurate top-view drawing with precise dimensions, post placement, house attachment type, slab material, and target delivery city.
- Full Upfront Payment: Standard custom DIY orders must be paid in full prior to factory cutting and packaging. Because components are cut to custom measurements, orders are non-refundable once production begins.
- Packaged Freight Shipping: Kits arrive bundled in protective plastic wrap and heavy cardboard boxes. Verify all component pieces against your packing sheet prior to installation day.
If you are weighing the effort required against expert turnkey installation, review our detailed guide comparing DIY Awning Installation vs Hiring a Pro in Utah.
Assessing Feasibility: Tools, Guides, and Self-Installation
Is assembling an Alumawood kit realistic for your practical skillset? While Alumawood components are light compared to solid timber, precision measuring, proper structural anchoring, and comfort working on ladders are essential. For detailed step-by-step structural mechanical procedures, consult our Aluminum Pergola Installation Guide.
Tools Required for Assembly
- Cordless impact driver and heavy-duty drill
- Hex head magnetic nut drivers (1/4″ and 5/16″)
- 4-foot magnetic level and line levels
- Chalk line and measuring tapes
- Miter saw with non-ferrous carbide metal-cutting blade
- Hammer drill with masonry bits (for concrete pad anchors)
- Step ladders, safety glasses, and heavy work gloves
- High-grade silicone sealant (color-matched)
Step-by-Step Installation Guides
Alumawood provides detailed, model-specific installation manuals covering:
- Open Lattice Instructions: Laying out post bases, mounting fascia brackets, lifting main headers, setting rafters, and snapping on lattice tubes.
- Newport Flat Panel & Maxx Panel Instructions: Installing house wall ledgers, interlocking solid roof panels, sealing water troughs, and attaching integrated gutter systems.
- Equinox Louvered Guides: Aligning motorized louver tracks, connecting pivot pins, and wiring low-voltage drive motors.
Feasibility Comparison: Self-Installation vs. Professional Installation
| Feature / Factor | DIY Kit Self-Installation | Professional Installation (Awnings Unlimited) |
|---|---|---|
| Labor Requirement | 2–3 capable adults across 1–2 full weekends | Handled entirely by experienced installation crew |
| Tool Requirements | Requires owning/renting specialized drills, metal saws, ladders | Professional crew arrives with all specialized equipment |
| Permit & Engineering | Homeowner files permits and calculates local load specs | Handled by contractor with engineering compliance |
| Measuring Risk | Error in ordering measurements falls on homeowner | Contractor assumes responsibility for exact site fit |
| Warranty Protection | Factory material warranty only | Factory material warranty PLUS professional labor warranty |
For homeowners across Salt Lake City, Draper, Ogden, Provo, Park City, and surrounding Wasatch Front communities, working with Awnings Unlimited eliminates installation stress, load-calculation mistakes, and municipal permitting headaches.
Frequently Asked Questions about Alumawood DIY Kits
What hardware and screws are included in a standard Alumawood DIY kit?
Standard alumawood diy kits come equipped with all primary structural fasteners required to build the frame. This includes self-drilling #14 TEK screws (3/4″) for main structural joint connections, #8 TEK screws (1/2″) for end caps and decorative aluminum trim, post attachment brackets, ledger wall attachment plates, header brackets, nuts, bolts, and expansion anchors for concrete slabs.
What is included in an Alumawood DIY fan kit and how is it installed?
An Alumawood fan kit (such as the popular 2’6″ Fan Kit) includes one 3″x8″ heavy-gauge aluminum structural beam cut to a 2’6″ length, two inside mill-finish brackets for new construction, two outside color-matched painted brackets for retrofitting existing structures, 10 #14 TEK screws (3/4″), and 20 #8 TEK screws (1/2″). During new cover assembly, inside brackets are concealed within adjacent rafters. When retrofitting an existing patio cover, outside painted brackets secure the beam directly between existing roof rafters to safely distribute ceiling fan weight.
How does the ordering and payment process work for Alumawood DIY kits?
To order a custom DIY kit, you submit a dimensional top-view diagram detailing cover width, projection, post distances, house attachment construction type, slab surface, and preferred enamel color. Because materials are cut and packaged to exact custom dimensions, suppliers require full payment upon ordering. Kits are then factory packaged and delivered via freight.
Conclusion
Choosing between building an Alumawood DIY kit yourself or hiring professional installers comes down to your comfort with construction, available tools, and local building requirements. While DIY kits provide pre-packaged components and color-matched hardware, proper measurement, load calculations, wall flashing, and structural anchoring are critical for long-term safety and performance.
Since 1976, Awnings Unlimited has provided homeowners across Salt Lake City, the Wasatch Front, and Northern Utah with high-quality shade solutions designed for mountain weather. Whether you need design guidance, specialized accessory kits, or turnkey professional installation with comprehensive warranty backing, our experienced team is here to help.
Ready to explore your outdoor shade options? Get a Free Quote for Custom Patio Cover Solutions from Awnings Unlimited today!