


Why DIY Patio Cover Kits Are the Smartest Way to Upgrade Your Outdoor Space
DIY patio cover kits are pre-engineered shade structure packages that include all the components you need to build a permanent patio cover yourself — without hiring a contractor.
Here’s a quick overview of what you need to know:
| Feature | Details |
|---|---|
| Materials available | Aluminum (Alumawood), vinyl, cedar, polycarbonate, galvanized steel |
| Roof styles | Solid, lattice, insulated, freestanding, wall-mounted |
| Starting prices | Lattice from $1,120 · Solid from $1,259 · Insulated from $2,235 |
| Typical savings vs. contractor | $1,000–$5,000 on installation |
| Assembly time | 2–3 hours (bracket kits) to 1–2 days (full structures) |
| Best for | Homeowners who want durable, custom shade with long-term value |
Adding a permanent patio cover is one of the most effective ways to extend your outdoor living space, protect against sun and rain, and boost your home’s value. But professional installation isn’t always in the budget — and that’s exactly where DIY kits shine.
The right kit gives you professional-grade materials, engineered components, and clear instructions. The result looks like a contractor built it, at a fraction of the cost.
That said, not all kits are equal. Material quality, structural ratings, warranty coverage, and ease of assembly vary widely. This guide breaks it all down so you can make a confident choice.
At Awnings Unlimited, we’ve been installing and supplying structural patio covers across Northern Utah since 1976, giving us nearly five decades of hands-on expertise with the same materials found in today’s top DIY patio cover kits. Whether you’re building it yourself or want a professional finish, we know what separates a cover that lasts from one that doesn’t.
Understanding DIY Patio Cover Kits vs. Professional Installation
When you decide to add shade to your backyard, the first big question is usually: “Should I do it myself or call in the pros?” Choosing diy patio cover kits offers a middle ground between a flimsy umbrella and a full-scale home addition.
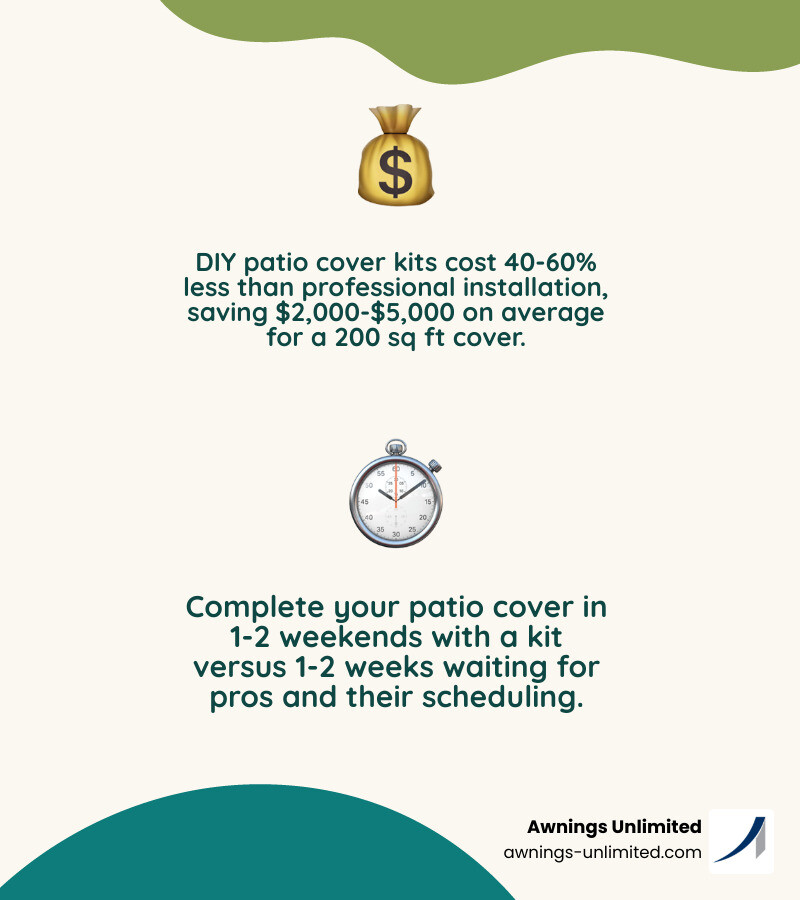
The most obvious draw is the cost savings. By providing the sweat equity, homeowners can typically save between $1,000 and $5,000 on labor costs alone. However, it is important to weigh these savings against the time and skill required. In our experience along the Wasatch Front, a professional installation ensures that every bolt is torqued to spec and every post is perfectly plumb, which is vital for long-term structural integrity.
To help you decide which path is right for you, check out our guide on DIY Awning Installation vs Hiring a Pro in Utah.
| Factor | DIY Patio Cover Kits | Professional Installation |
|---|---|---|
| Upfront Cost | Lower (materials only) | Higher (materials + labor) |
| Customization | Limited to kit options | Fully custom designs |
| Time Investment | 1-3 weekends | 1-2 days (by pros) |
| Permits | Homeowner handles | Contractor usually handles |
| Warranty | Manufacturer (parts only) | Parts + Labor Guarantee |
Benefits of Choosing DIY Patio Cover Kits
The primary benefit is budget flexibility. If you are looking for cheap patio roof ideas, a kit allows you to access high-quality materials like Alumawood or heavy-duty vinyl that might otherwise be out of reach if you had to pay for a full crew.
Additionally, these kits are designed for shipping. Most components arrive pre-cut and pre-drilled, reducing the need for specialized machinery. This “Lego-style” assembly means you can see a massive improvement in your property value and curb appeal over a single weekend. Plus, there is a certain level of pride that comes from sitting under a structure you built with your own two hands (and maybe a few bribes of pizza for your neighbors).
Common Installation Challenges
It isn’t all sunshine and easy assembly, though. The most common hurdles we see homeowners face include:
- Anchoring: Securing the structure to a concrete pad or footings requires precision. If your anchors aren’t set correctly, the whole structure is at risk during a Utah windstorm.
- Permits: Navigating local building codes in places like Salt Lake City or Provo can be tricky. Most permanent structures require a building permit.
- Heavy Lifting: While aluminum is lightweight, large beams or insulated panels can be awkward and heavy.
- Alignment: If your house wall isn’t perfectly flat (and few are), getting a wall-mounted kit to sit flush takes patience and skill.
Popular Materials and Styles for Your Patio Project
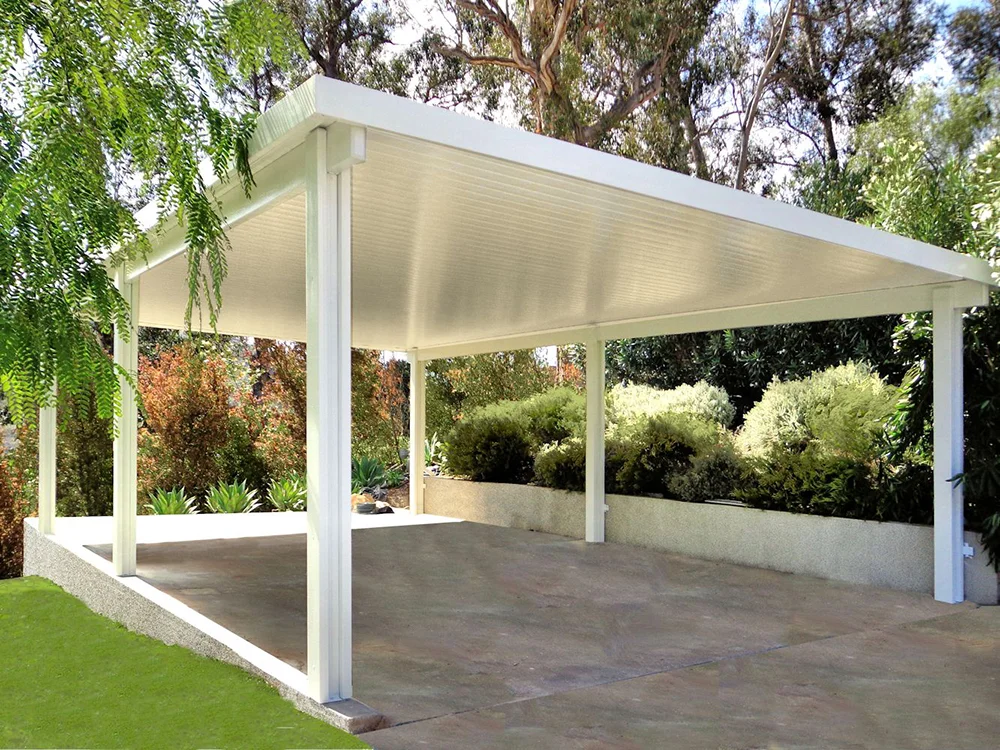
Selecting the right material is the most important decision you’ll make for your outdoor living space. For a deep dive into the specifics, read our Patio Covers 101: Materials, Styles, and Maintenance Tips.
Aluminum and Alumawood DIY Patio Cover Kits
Aluminum is the king of the DIY world, specifically “Alumawood.” This material offers the embossed texture and beauty of real wood but is made from 100% structural aluminum.
- Durability: It is termite-proof, non-combustible, and won’t rot, crack, or warp.
- Finish: High-quality kits use an Aluma-Shield paint system (often with Teflon) that repels dirt and resists the intense UV rays we get in high-elevation areas like Park City.
- Maintenance: It is virtually maintenance-free. You won’t be sanding, staining, or painting every three years.
For more on these modern options, see The Ultimate Guide to Patio Cover Types: Insulated, Modern, Freestanding, and More.
Solid vs. Lattice Roof Designs
You generally have two choices for the “roof” of your kit:
- Lattice (Pergola style): These provide partial shade (usually 40-60% light reduction) while allowing for maximum airflow. They are perfect for creating a “garden” feel.
- Solid Roof: These provide 100% protection from rain and snow.
- Non-Insulated: Affordable and effective at blocking the sun.
- Insulated Roof Panels (IRP): These feature a high-density foam core between aluminum skins. They are strong enough to walk on and can lower the temperature under the cover by up to 15 degrees.
Before you pull the trigger, make sure you understand the nuances in Patio Covers 101 – Everything You Need to Know Before You Buy.
Planning, Costs, and Customization for DIY Patio Cover Kits
Planning is where you save yourself from future headaches. Many modern diy patio cover kits offer 3D builders that allow you to visualize the structure against your home before you spend a dime. You can explore various DIY options to see what fits your space.
Estimating the Cost of DIY Patio Cover Kits
While prices fluctuate based on material costs, here are some general starting points for standard sizes:
- Lattice Kits: Starting around $1,120.
- Solid Non-Insulated: Starting around $1,259.
- Solid Insulated: Starting around $2,235.
- Large Custom Kits (e.g., 12×30): Can range from $4,200 to $4,800, especially if you add electrical channels for fans and lights.
Choosing the Right Size and Configuration
Choosing the right size depends on your “use case.” Are you covering a small bistro set or a full outdoor kitchen?
- Wall-Mounted: Attached directly to your home’s ledger board. This is the most common and stable configuration.
- Freestanding: These kits stand on four or more posts and can be placed anywhere in the yard, perfect for a poolside retreat.
- Snow Load & Wind Ratings: In Utah, this is non-negotiable. Ensure your kit is rated for at least 30-40 lbs per sq. ft. snow load if you live in areas like Heber or Ogden.
Installation Guide: Tools, Skills, and Preparation
Before the pallet arrives on your driveway, you need to prepare. Reviewing DIY instruction guides early will help you understand the scope of the project.
Essential Tools for DIY Assembly
You don’t need a professional workshop, but you will need more than a screwdriver.
- Power Drill/Impact Driver: With a variety of hex heads and drill bits.
- Level: A 4-foot level is best to ensure your beams and posts are straight.
- Circular Saw: With a fine-tooth carbide blade (for trimming aluminum or wood).
- Ladders: At least two (one for you and one for your helper).
- Measuring Tape: Accurate measurements are the difference between a beautiful cover and a lopsided one.
- Stainless Steel Screws: Most quality kits include these to prevent rust streaks.
Maintenance and Longevity
One of the reasons we love aluminum and high-end vinyl is the low maintenance. To keep your kit looking new:
- Annual Cleaning: Spray it down with a garden hose to remove dust and pollen.
- Gutter Check: If your kit has integrated gutters, make sure they are clear of leaves so water doesn’t back up.
- Inspection: Check the anchors and fasteners once a year to ensure everything remains tight after the freeze-thaw cycles of a Utah winter.
Frequently Asked Questions about DIY Patio Covers
Do I need a permit for a DIY patio cover?
In almost all cases along the Wasatch Front, yes. Permanent structures attached to the home or over a certain square footage usually require a building permit. Most reputable kit providers can supply engineering documents to help you through the zoning and safety approval process.
How long does it take to install a patio kit?
It depends on the “block” system of the kit. Simple bracket-based pergola kits can be framed in 2–3 hours once the lumber is prepped. Full solid-roof aluminum structures typically take 1–2 full days for two people with moderate DIY skills.
Can I add a ceiling fan or lighting to my DIY kit?
Yes! Many aluminum kits feature “hollow” beams or “electrical channels” that allow you to chase wires through the structure. This keeps the wires hidden and protected from the elements. Just ensure any fans or lights you buy are “Wet Rated” or “Damp Rated” for outdoor use.
Conclusion
Investing in one of the many diy patio cover kits available today is a fantastic way to upgrade your home’s outdoor functionality. Whether you choose the wood-like elegance of Alumawood or the heavy-duty protection of an insulated solid roof, you are creating a space that your family will enjoy for decades.
At Awnings Unlimited, we believe in doing things right the first time. If the idea of permits, heavy lifting, and anchoring into concrete feels a bit overwhelming, we are here to help. We bring professional-grade materials and decades of Utah-specific experience to every project.
Ready to explore your DIY options or perhaps get a quote for a professional installation? Give us a call or visit our Salt Lake City showroom. Let’s build something great together!